
When summer rolls around, many kids are home from school and looking for summer activities to keep them busy. We’ve got a round-up of some of the most fun summer crafts and art ideas to get you started. Working on crafts and art projects can help kids practice their fine motor skills, exercise their imagination, and fill your home with more color and summer decorations.
Our list is filled with options that don’t require a whole closet of craft supplies. These are easy, simple projects that you probably already have most of the supplies for in your home. Art projects are ideal for any type of weather and can fit perfectly in between reading, watching cartoons, and going on outings.
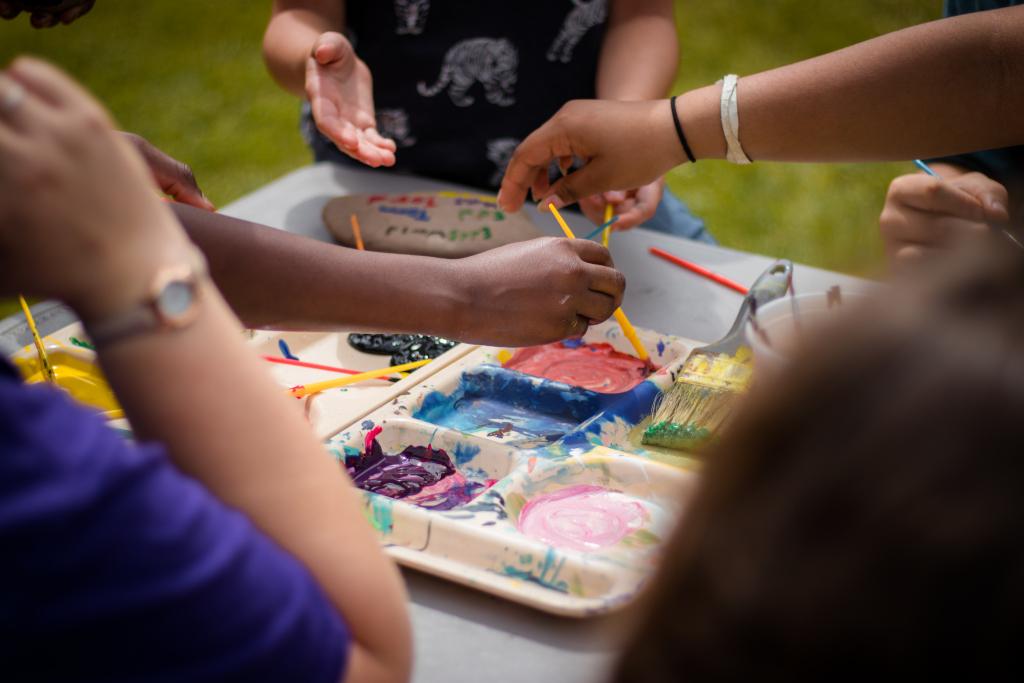
Add some adventure to your summer!
As the weather warms up and summer fun moves into full effect, make sure you have a copy of Adventures From Scratch to keep your family on their toes! Each scratch-off activity book offers over 50 suggestions for you to connect while you complete tasks together. In addition, you’ll find tear-out cards and other interactive elements so you can converse, record your experiences, and more. Check it out!
Summer Art Projects For Kids to Try
This list of craft ideas is perfect for preschoolers and elementary-aged children. These summer-themed crafts will help bring some color to your living space and give your kids the chance to practice using their imagination and creativity.
Paper Plate Ladybugs
A simple paper plate craft is to make ladybugs. It’s the perfect shape to make their rounded backs and can be a great decoration for the fridge during the summer season.
Supplies needed:
- Paper plates cut in half
- Small circles for the face
- Red and black paint (or markers)
- Googly eyes (optional)
- Black yarn or ribbon
- Glue and tape
- Paintbrush and cotton balls
To create your ladybugs, you’ll want to have the kids paint half of the plate red to make up the body of the ladybug. The small circle should be painted black and will make up the ladybug’s face. Once those are dry, glue the small black circle onto one side of the red body. If you have googly eyes, you can add those to the face as well.
Using cotton balls dipped in black paint, your kids can add spots to the ladybug’s back. Once all the paint is dry, add legs by taping the black yarn to the back of the bug’s body. You can hang these ladybugs up on the windows or the refrigerator once complete.
Finger Painted Trees
Trees start blooming in the spring and add some color to the neighborhood. You can use this as an inspiration for a summer craft that uses finger paints.
Supplies needed:
- A large piece of white paper
- Pencil
- Brown paint
- Fingerpaint in many colors
- Newspaper or tarp to keep surfaces protected
First up, you’ll want to create a trunk. You can do this for your child or draw the outline with a pencil and have them paint the trunk brown. There are some printable tree trunk patterns if you want the simplest options.
Once the trunk is dry, put out the colors of fingerpaints. Add shades of greens and maybe some bright colors to represent flowers. Let the kids go crazy adding the leaves all around the trunk. They can just use fingerprints or they can paint a little more with their fingers. This is a craft you can also do in the fall with gorgeous autumn hues.
Toilet Paper Roll Bees
Give your toilet paper rolls a second life by using them for crafts. They can become many animals, but one that is fun in the summertime is a bumblebee. Plus, it gives you the chance to talk about the importance of bees to our environment.
Supplies needed:
- Toilet paper rolls
- Black marker
- White, yellow, and black paper
- Black pipe cleaner
- Glue
- Scissors
- Googly eyes
The first step is to cover the roll with yellow paper. It should cover the entire roll which is the bee’s body. You’ll cut out two strips of black paper and glue them onto the yellow body as stripes—leave room on the top of the roll for the face. With the white paper, cut out two wings and glue those to the back of the bee’s body.
Once the paper is all glued on, you can add the special touches. Black pipe cleaners will be the antennas. You just bend it into a “V” shape and roll up the ends a little bit. Lastly, add the face with the googly eyes and draw on a smile with the black marker.
Dried and Pressed Flowers and Leaves
Do your kids love bringing home flowers and leaves while you’re out on nature walks? This is a great way to use those to make something useful or beautiful. Bookmarks are a popular use for these flowers and leaves.
Supplies needed:
- Leaves and flowers
- Large, heavy book
- Clear contact paper
- Scissors
Bring your collected leaves and flowers home and place them a few inches apart inside the book. If you don’t have a thick, heavy book, you can place them in a smaller one and place something heavy on top. You just want enough pressure to flatten the flowers. Leave it for at least two days.
Once the flowers and leaves are flat and dried, you’re ready to make a bookmark. Cut out a piece of clear contact paper for the size that you want to use and peel the sticky back off of the paper. Lay out the flowers and leaves on top of the clear contact paper however you want. Cover the flowers with another piece of clear contact paper and then trim the sides down to the size you want. Put it in your favorite book and enjoy it forever.
Sidewalk Chalk Art
Easy summer crafts are important because there will be days when you need something to grab and go. Chalk is one of the most popular summer art projects.
Supplies needed:
- Sidewalk chalk of all colors
- A driveway or sidewalk
There are no rules or instructions for chalk. Kids can create whatever they want on their blank canvas and it will remain until it’s washed away in the rain or with the hose. There are over a hundred chalk ideas here if you need some inspiration.
Tie-Dye Projects
A fun outdoor project for the summer is tie-dying t-shirts. You’ll create pieces of clothing that you can wear over and over again all summer long and kids will love to be involved in the process. This will require a little more supervision from adults because the dyes can make a giant mess.
Supplies needed:
- Different colors of dye
- Plain white t-shirts
- Laundry detergent
- Rubber bands
- Buckets
- Material to protect the workspace
- Gloves
- Ziplock bags
Prep all your supplies by laying out any protection needed and adding the dye to buckets. Grab the t-shirts and prep them for dyeing. Rubber bands are used to tie up and hold together the shirt which will give it distinct patterns. You can find ways to tie it on youtube if you are looking for a specific design.
Apply the dye by dunking the shirt into buckets. You can also use squirt bottles to be more precise and cut down on mess. Once the colors are applied, let it sit for a while to dry. The shirt needs to be rinsed, washed, and then it’s ready to show off all summer long.
Plastic Bottle Fireflies
Catching fireflies on summer evenings is a fun activity, but not everyone lives in an area with fireflies or stays up late enough to find these beautiful creatures who come out after dark. Try this DIY project to create your own.
Supplies needed:
- Empty plastic bottles
- Glow sticks
- Tissue paper
- Googly eyes
- Colorful paper
- Glue or tape
Start with empty plastic bottles and decorate them to look more like a firefly. Use colorful tissue paper and glue it to the outside of the bottle. It should be tissue paper because it’s transparent and you want light to get through. In addition, cut out some wings from colored paper and glue them to the bottle. Finish the decorating with a face made with googly eyes.
The final step is to add glow sticks to the inside of the bottle. Then, turn the lights off and enjoy these glowing creatures even during the middle of the day (as long as you have black-out shades.)
Oceanscape Made With Shells
If you can’t make it to the beach every day of your summer vacation, you can bring a little of the beach to your art wall. This is a great way to utilize the shells you collected from your last beach trip.
Supplies needed:
- Seashells
- Markers
- Colorful paper
- Glitter paints
- Glue
- A large poster board or heavy cardstock
Create an ocean scene on a heavier piece of paper, preferably blue to match the color of the ocean. Children can paint the seashells to look like fish or just glue them to the paper. Cut starfish, whales, or dolphins out of colored paper or draw them with markers onto the background.
Glitter paints add a sparkly texture that will make it look more like water. This can be another fun way to dress up the shells as well. Get creative with textures and mediums!
Jellyfish Windsock
Want some porch decorations that your kids can make themselves? This Jellyfish craft is easy and can hang up all summer long.
Supplies needed:
- Paper cups
- Googly eyes
- Ribbons of different colors
- Markers
- Tape
- A strong piece of string
- A tool to poke a hole in the cup
Start by decorating the paper cups. The kids should make the faces so that the opening of the cup is on the bottom. Use markers and googly eyes to decorate the cup to look like a jellyfish face. Once you’re done with that, they can select ribbons and start taping them to the inside of the cup to hang down. Those will be the tentacles.
The final step is to poke a hole in the top and knot a string to use as the way to hang the windsock on your porch. Once the breeze comes, the jellyfish will dance in the wind and the ribbons will flow like it’s swimming.
Summer Scrapbook
One fun summer craft for kids that they can work on all summer long is a scrapbook. This is a great way to let them capture their own memories and it will be a great keepsake. Do a new one each year to see how their craft skills progress.
Supplies needed:
- Notebook or journal
- Crayons and markers
- Any photos or souvenir items that are flat
- Stickers, glue sticks, or tape to hold things in place
Any notebook or binder can be turned into a scrapbook. You just need to collect photos and pieces of paper that they can tape into their scrapbook throughout the summer. If you take a trip to the zoo, maybe they can take the paper map and cut out their favorite parts to add to the scrapbook. It’s a fun way to document memories and get the art supplies out.
Painted Plant Pots
Do your kids have a green thumb and an interest in plants? Maybe you even have a small garden that they’ve helped plant seeds in the springtime. This craft lets them decorate the pots that plants live in so they can add their own flair to the garden.
Supplies needed:
- Clay pots
- Paint
- Paint brushes
- Protection for the painting surface
Cover a table or workspace with newspapers or some type of protection so kids can paint without ruining anything. Get out paint brushes of various sizes and cups of water for rinsing. Have them decorate the pots in whatever they want. They can add faces or paint them the same colors as their favorite plants.
Once the pots have dried, add the plants to them and put them out for the kids to enjoy. Give them the task of watering them as well to keep them interested all summer long.
Create a Boat
Not everyone can afford a boat to float around on in the summertime or maybe you don’t live close enough to a body of water big enough for boating. Bring the activity to your own bathtub or pond near your house by making your own boats.
Supplies needed:
- Printable templates for sails
- Floatable materials
- Straw or craft stick
- Markers to decorate
This is a mixture of a science project and an art project. Set out some materials that will float, like corks, plastic bottles, egg cartons, or containers. Let the kids cut out the paper sails and decorate them with markers. They can select their floating device and attach the sail to it.
Set up a spot for a race and make the reveal fun. They can set their boats in the water and see if they float and can survive a sail. Use a fan to move them across and you can make a race out of it. If their creation doesn’t make it, encourage them to go back to the drawing board and try something different.
Colorful Rock Gardens
Gardens are colorful places with plants and flowers. Why not brighten up the ground cover for your garden as well or cheer up your neighbors with a little gift?
Supplies needed:
- Flat rocks
- Paints
- Paint brushes
- Bucket with water
Clean off the collection of rocks that you have in a bucket with water. Once they are dry and clean, you can use the paintbrush to add colors and designs to the rocks. It’s as simple as that. Once they are dry, you can put them out in the yard or leave them along your sidewalk for people to take one that they love.
Window Suncatchers
One of the best parts about summer is the amount of sunlight that shines through the windows. Create a watermelon, flower, or sunshine-themed sun catcher to hang in your window.
Supplies needed:
- Colorful tissue paper
- A plastic lid you no longer need (from a coffee can or something similar)
- Tape or glue
Tissue paper is a perfect material for a suncatcher because it won’t block the light coming through. Cut the tissue paper into smaller pieces and then have your child tape or glue them onto the plastic lid. You can help them make it look like a watermelon or keep it all yellows and oranges to look like the sun itself.
Once they are done, you can hang up the masterpiece in the window and watch the sun change the light into many colors.
Handprint Animals
Handprints are an incredible keepsake because they are such a personal piece of your child, but you can preserve them in so many ways. If you want something summer-themed, consider some handprint animals or even plants.
Supplies needed:
- Fingerpaints
- Paper plate
- Baby wipes
- Markers and construction paper
Choose an animal and draw an outline on construction paper using a marker. Let your child color in the background and parts of the animal you chose, but make the main part of the body using the child’s handprint. Spread some fingerpaints on a paper plate and then have your little one dip his or her hand in the paint and press it down on the paper. Projects like this make great gifts for family members and loved ones.
Paper Pinwheels
Do your kids love fidget spinners? Have them make a DIY spinner by doing this paper pinwheels craft project.
Supplies needed:
- Scissors
- Pencil
- Ruler if you want it to be perfect
- Square-shaped piece of paper
- Straw
- Push pin
- Tape
Take your piece of paper and draw a point in the middle of the paper. Draw a line from each corner of the paper towards the center but stop about halfway to the dot. This is where a ruler can come in handy. Cut on the lines and then fold the flaps towards the center dot. The push pin will hold them in place.
Use the same push pin to attach these to a straw. Once it’s attached, it’s ready to go. You can stick it in a plant or just use deep breaths to spin it on your own.
Upgrade Your Water Bottles
A very simple craft project you can get the kids excited about is upgrading your water bottles. If you have some reusable water bottles, have the kids decorate them with stickers or puffy paint. Each child should have their own and keep them with them to stay hydrated, especially when playing outside. By picking unique stickers and making them their own, it might help them be more invested in the bottles.
Popsicle Stick People
Summertime is the perfect time for popsicles and ice cream treats on a stick. Why not repurpose those sticks and make some crafts?
Supplies needed:
- Craft sticks from the treats
- Markers
Take all the sticks and clean them off. Once they are dry, use the markers and color for faces, hair, and clothes. You can also use shoeboxes to create scenes or houses for the popsicle stick people.
You can also use cut-down pool noodles instead of popsicle sticks for a larger version. Get creative with the items you use to transform them into creatures.
Make a Summer Garland
Garlands are fun DIY projects where the kids can get involved. There are so many unique materials you can use and directions you can go. Ice cream cones can be made with construction paper stuffed with tissue paper and strung up. You can also string together some flattened-out cupcake liners that the kids color into flowers.
Use colorful string and ribbon to hold the pieces together. Keep it colorful and hang it up in your living room or kitchen for an instant mood booster. This is a great way to decorate year-round and change up the DIY garlands you have.
Coffee Filter Butterflies
Coffee filters are great for crafts because they are cheap and most people have them in their cabinets already. One fun summer craft project is making coffee filter butterflies.
Supplies needed:
- Watercolors
- Coffee filters
- Pipe cleaners
- Clothespins
Lay out the coffee filters and have the kids paint them all different colors using watercolors. The filter paper will give the paint a really cool look because it will bleed a little and spread. Once those are dry, use the clothespins to pull the center together and make the body of the butterfly. You can help them readjust the wings so they stay spread out.
Once the main part of the butterfly is complete. You can add pipe cleaners to the top of the clothes pin and that will make up the antennae. Put these up on the windows or the fridge and enjoy.
Try these summer art projects with your kids!
If you need more inspiration outside of these ideas, you can turn to sites like Pinterest and Red Ted Art which have even more tutorials and ideas for art activities. I Heart Crafty Things has some fun how-to guides to help kids learn to draw certain objects as well. There are so many incredible resources for free, so check them out.
Frequently Asked Questions
There are so many summer art projects that use household items like coffee filters or empty plastic bottles. Give your kids the tools they need to let their creativity run wild!
Organize a few summer art projects for your kids, like making friendship bracelets or doing a giant sidewalk chalk art piece. You can even invite the neighborhood kids over for yard games!
This summer, organize some summer art projects for the kiddos or grab a copy of Adventures from Scratch, which has dozens of fun challenges for the family to scratch off and try out.